
cladding detailing around windows
Cladding Detailing Around Windows
In the construction of high-rise and multi-storey buildings, the cladding window interface detail represents one of the most critical points of the building envelope. It is the junction where two primary systems—the external wall and the glazing—meet. If this interface is incorrectly designed or poorly executed, the building becomes vulnerable to water ingress, air leakage, and significant fire safety risks.
On this page
12 min read
Last updated
Cladding Detailing Around Windows
In the construction of high-rise and multi-storey buildings, the cladding window interface detail represents one of the most critical points of the building envelope. It is the junction where two primary systems—the external wall and the glazing—meet. If this interface is incorrectly designed or poorly executed, the building becomes vulnerable to water ingress, air leakage, and significant fire safety risks.
For building owners and managing agents, understanding cladding detailing around windows is not merely a technical requirement; it is a matter of long-term asset protection and regulatory compliance. Modern façades are complex multi-layered systems, and the perimeter of a window is where these layers are most exposed. A failure in the external wall window perimeter detail can lead to hidden rot in the sub-structure, mould growth in apartments, or the rapid spread of fire through cavity gaps.
At Cladding Testing, we specialise in identifying whether these interfaces were installed correctly and determining the safest, most cost-effective route for remediation when they fail. This guide provides a comprehensive technical overview of what constitutes a compliant window-to-cladding junction in the UK market.
Key Takeaways
- Interface Integrity: The junction between the window frame and the cladding system must be both weather-tight and fire-safe.
- Cavity Barriers: Correct installation of fire-stopping and cavity barriers around window openings is a legal requirement for multi-storey buildings.
- Moisture Management: Detailing must include effective EPDM membranes and flashings to prevent water reaching the insulation layer.
- Differential Movement: Details must account for the fact that windows and cladding panels expand and contract at different rates.
- Regulatory Compliance: All detailing must align with Approved Document B (Fire Safety) and Approved Document L (Conservation of fuel and power).
- Remediation: Localised repairs are often possible if the underlying fire-stopping is intact; otherwise, full perimeter remediation is required.
What is Cladding Detailing Around Windows?
Cladding detailing around windows refers to the specific design and installation methods used to bridge the gap between a window frame and the external cladding panels. This "interface" involves several hidden components, including EPDM (Ethylene Propylene Diene Monomer) membranes, vapour barriers, cavity barriers, and structural flashings.
The primary functions of this detail include:
- Fire Protection: Preventing flames from entering the wall cavity at the window head, sill, or jamb.
- Weatherproofing: Diverting rainwater away from the internal wall and preventing moisture from saturating the insulation.
- Airtightness: Reducing heat loss and preventing condensation by sealing the gap between the window and the inner leaf.
- Aesthetics: Providing a clean finish that conceals the internal components of the rainscreen system.
The Rainscreen Principle at the Window Junction
The rainscreen detail around windows relies on the principle of pressure equalisation. The outer cladding panel acts as a first line of defence against rain, while the cavity behind it allows any moisture that does penetrate to drain away or evaporate.
However, the window opening breaks this continuous shield. Therefore, the detail must ensure that the "wet" zone (the cavity) remains strictly separated from the "dry" zone (the internal structure). If a facade window junction detail is missing its internal drainage tray or has a compromised membrane, water will inevitably track back into the building, often appearing as dampness around the window reveal inside a flat.
Core Components of a Compliant Window Interface
1. EPDM and Vapour Barriers
The EPDM membrane is the unsung hero of the external wall window perimeter detail. This flexible, rubber-like material is bonded to the window frame and the inner wall (usually a Steel Frame System or masonry). It creates a weather-tight seal that accommodates the building's natural movement.
In many older or poorly constructed buildings, we find that the EPDM was either not used, incorrectly bonded, or damaged during the installation of the cladding panels. This leads to air leakage and water ingress that is difficult to diagnose without a professional survey from Cladding Testing.
2. Cavity Barriers and Fire Stopping
Current UK building regulations, specifically following the updates to Approved Document B, require robust fire-stopping around all "apertures" (openings) in the external wall. The cladding window interface detail must include a cavity barrier around the full perimeter of the window.
These barriers are designed to expand when exposed to heat (intumescent) or are made of non-combustible mineral wool. Their role is to close the gap between the window and the cladding, preventing a fire from jumping from the interior of a room into the combustible (or even non-combustible) cavity behind the panels.
3. Metal Flashings and Closures
The visible parts of the cladding detailing around windows are usually powder-coated aluminium flashings. These include:
Window Sills: Designed with a "drip" edge to throw water away from the façade.
Jamb Flashings: The vertical side pieces that transition from the window to the panel.
Head Flashings: The top horizontal piece, which must be carefully integrated with the cavity barrier to allow ventilation while preventing fire spread.
Common Failures in Window Detailing
Inadequate Fire Cavity Barriers
During our inspections, we frequently discover "missing links" in the fire protection. Common issues include:
• Barriers that do not reach the back of the cladding panel (leaving a "chimney" for fire).
• Gaps between the barrier and the window frame.
• Barriers installed upside down or without the necessary intumescent strips.
When these defects are found, the facade window junction detail is non-compliant and represents a significant risk to life safety. In such cases, remediation is not optional; it is a necessity for insurance and safety certification.
Poor Water Management and "Tracking"
If the sill flashing does not have sufficient "fall" (incline), water will pool against the window frame. Over time, this water finds its way past sealants and into the wall system. We often see rainscreen detail around windows where the vertical jamb flashing overlaps the sill flashing incorrectly, effectively "funnelling" water behind the cladding rather than shedding it to the front.
Lack of Allowance for Thermal Movement
Aluminium cladding and window frames expand and contract significantly with temperature changes. If the cladding detailing around windows is too rigid—for example, if panels are hard-fixed directly against the window frame without a movement joint—the system will eventually buckle, or sealants will tear. This creates paths for air and water to enter the building envelope.
Incompatible Materials
We sometimes observe "galvanic corrosion" at window junctions. This occurs when incompatible metals (such as aluminium flashings and stainless steel fixings in certain environments) are used together without isolation. This leads to the premature degradation of the external wall window perimeter detail, compromising the structural integrity of the fixings holding the window surrounds in place.
The Investigation Process
If a building owner suspects issues with their cladding—perhaps due to visible leaks, drafts, or a failed EWS1 survey—a systematic investigation is required. At Cladding Testing, we follow a rigorous methodology to assess window detailing.
Stage 1: Visual and Invasive Inspection
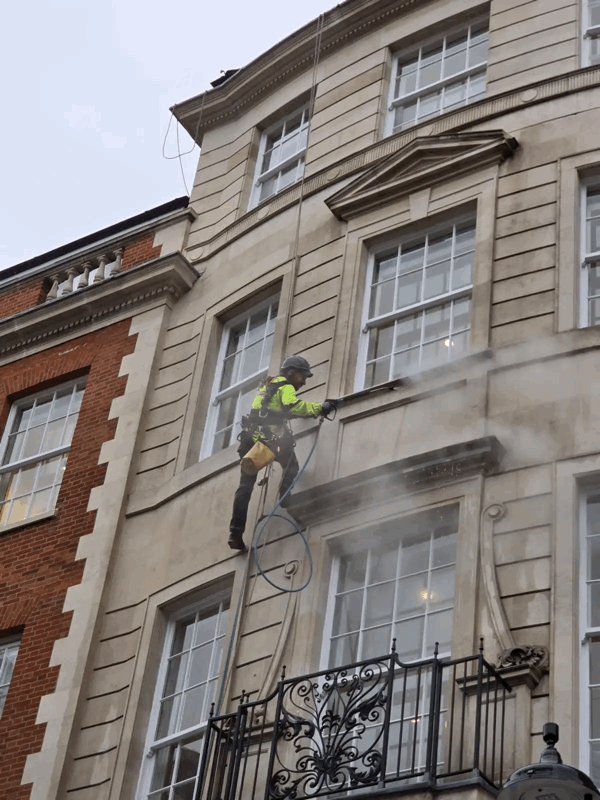
A simple visual check from the ground is rarely enough. Our teams use high-level access (MEWPs, cradles, or industrial rope access) to perform close-up inspections. We often perform "opening up" works, where a small number of cladding panels are removed around a window to inspect the hidden cavity barriers and EPDM membranes.
Stage 2: Water Tightness Testing
Where leaks are reported, we may conduct a hose test or a spray bar test in accordance with CWCT (Centre for Window and Cladding Technology) standards. By systematically wetting the cladding window interface detail, we can pinpoint exactly where the water is bypassing the defences.
Stage 3: Thermal Imaging
Thermographic surveys can identify areas of significant heat loss or cold bridging around windows. A cold spot around the internal window reveal often indicates a missing or poorly installed vapour barrier within the facade window junction detail.
Cladding Detailing Around Windows
Remediation and Repair Strategies
Not every building with window detailing issues requires a total reclad. Depending on the findings of our investigation, we categorise the solutions into three paths.
1. Localised Repairs
If the fire-stopping is compliant but there are minor water leaks, we may recommend localised repairs. This might involve:
• Replacing failed silicone sealants with high-movement alternatives.
• Adjusting metal flashings to improve water shedding.
• Re-bonding small sections of EPDM membrane.
2. Targeted Remediation
This is common when a building is generally sound but has a specific systemic defect, such as missing cavity barriers at the window heads. We can remove the perimeter cladding panels, install the necessary fire-stopping and rainscreen detail around windows, and then reinstate the original panels. This is significantly less disruptive than a full replacement.
3. Full Cladding Replacement
In cases where the cladding material itself is combustible (e.g., ACM PE) or the installation is so fundamentally flawed that repairs are not viable, a full reclad is necessary. In this scenario, the cladding detailing around windows is redesigned from scratch to meet modern building regulations and Euroclass A1 or A2-s1, d0 standards.
The Importance of Sequence in High-Rise Projects
When performing work on occupied high-rise buildings, the logistics of external wall window perimeter detail remediation are complex. You cannot simply leave a window interface open to the elements overnight.
Our project management team ensures a strict "strip and seal" sequence. This means that any section of the facade window junction detail that is opened up is made weather-tight before the end of the shift. This protects the residents' property and prevents internal damage during the works. Furthermore, we coordinate closely with residents to manage noise and privacy concerns while working directly outside their windows.
Technical Standards and Compliance (UK)
All cladding detailing around windows must adhere to a strict set of UK standards. Failure to meet these usually results in a building being unmortgageable or uninsurable.
- Approved Document B: Governs fire safety and the requirement for cavity barriers.
- Approved Document L: Governs thermal performance and airtightness.
- CWCT Standards: The industry-recognised benchmarks for the design and testing of building envelopes.
- NHBC Chapter 6.9: Provides specific guidance on curtain walling and cladding interfaces for new builds.
We ensure that every cladding window interface detail we inspect or remediate is cross-referenced against these standards to provide building owners with absolute peace of mind.
Advanced Detailing: Addressing Cold Bridging
A common problem in older external wall window perimeter detail designs is "cold bridging." This occurs when a highly conductive material (like an aluminium bracket) passes directly from the cold exterior to the warm interior without a thermal break.
Modern cladding detailing around windows uses thermal isolators—often high-density plastic or specialised rubber—to "break" the bridge. This prevents condensation from forming on the inside of the window reveal, which is a leading cause of mould and respiratory issues for residents. During our remediation projects, we look for opportunities to upgrade these thermal breaks, improving the building's overall energy efficiency.
Working with Occupied Buildings
Remediating the facade window junction detail on an occupied apartment block requires more than just technical skill; it requires sensitive communication. Unlike a new build site, we are working inches away from people's living rooms and bedrooms.
We employ specific strategies to minimise disruption:
• Acoustic Management: Scheduling drilling and heavy works during agreed hours.
• Privacy Screening: Using translucent films on scaffolding where appropriate.
• Resident Liaison: Providing clear timelines for when work will occur around specific window banks.
Maintaining Window Details
Once a cladding detailing around windows system is installed or repaired, it requires ongoing maintenance to reach its full design life (typically 30–60 years). We recommend:
• Annual Inspections: Checking for sealant degradation and blocked drainage holes.
• Cleaning: Removing salt and pollutants that can corrode aluminium flashings.
• Gully Clearing: Ensuring that the window sills and drainage channels are free of debris.
Regular maintenance, documented by a specialist like Cladding Testing, can significantly extend the life of the façade and prevent the need for costly major interventions in the future.
Frequently Asked Questions
Why is water leaking through my window cladding?
Leaks are usually caused by a failure in the cladding window interface detail. This could be a torn EPDM membrane, blocked drainage paths within the rainscreen, or sealants that have reached the end of their lifespan. An invasive survey is usually required to find the exact source, as water often travels a long distance behind the panels before appearing inside.
Do I need to replace all my cladding if the window details are wrong?
Not necessarily. If the cladding panels themselves are safe and compliant, we can often perform targeted remediation of the external wall window perimeter detail. This involves removing the perimeter panels, fixing the internal barriers and membranes, and then putting the panels back.
What is a cavity barrier and why is it needed around windows?
A cavity barrier is a piece of fire-stopping material that closes the gap between the building structure and the cladding. It is vital around windows because these are "apertures" where fire could potentially exit a room and enter the wall cavity. Without them, a fire could spread unseen throughout the entire height of the building.
How long does it take to repair window cladding details?
The timeline depends on the height of the building and the type of access required. For a standard apartment block, remediating the facade window junction detail can take anywhere from a few days to several weeks per elevation. We provide detailed programmes of work to managing agents to help coordinate with residents.
What is the difference between a sealant and an EPDM membrane?
A sealant (like silicone) is a liquid applied to joints to create a surface-level water seal. An EPDM membrane is a thick, durable rubber sheet bonded to the window and the wall behind the cladding. The EPDM is the primary weather defence, while the sealant is often just the secondary defence or for aesthetic purposes.
Is my building safe if it doesn't have fire-stopping around windows?
If a multi-storey building lacks proper cladding detailing around windows regarding fire-stopping, it is generally considered non-compliant with UK building regulations. You should seek a professional fire safety assessment and cladding inspection immediately to determine the level of risk and the necessary next steps.
Can cold windows be caused by cladding detailing?
Yes. If the external wall window perimeter detail lacks a proper vapour barrier or thermal break, "cold bridging" can occur. This makes the internal window surrounds very cold, leading to condensation and potentially mould growth, even if the windows themselves are high-quality.
How does Cladding Testing help with insurance claims?
We provide the technical evidence needed for insurance or legal claims. By documenting defects in the cladding window interface detail through photos, videos, and professional reports, we help building owners prove that the original installation was not carried out to the required standard.
Effective cladding detailing around windows is the hallmark of a well-constructed building. Whether you are dealing with a new build that is showing signs of premature failure or an older high-rise requiring fire safety upgrades, the focus must always be on the integrity of the interface. At Cladding Testing, we provide the expertise to ensure these junctions are weather-tight, thermally efficient, and, most importantly, safe.
Cladding Detailing Around Windows