
rainscreen cladding build up
Rainscreen Cladding Build Up
A rainscreen cladding build up is a multi-layered external wall system designed to protect a building's structure from the elements while managing moisture and thermal performance. It consists of an outer weather-resistant decorative panel, a ventilated drainage cavity, a support frame, insulation, and the structural backing wall. Unlike traditional sealed systems, the rainscreen principle relies on the pressure-equalisation and ventilation within the cavity to prevent water ingress and maintain the health of the building envelope.
On this page
12 min read
Last updated
Rainscreen Cladding Build Up
A rainscreen cladding build up is a multi-layered external wall system designed to protect a building's structure from the elements while managing moisture and thermal performance. It consists of an outer weather-resistant decorative panel, a ventilated drainage cavity, a support frame, insulation, and the structural backing wall. Unlike traditional sealed systems, the rainscreen principle relies on the pressure-equalisation and ventilation within the cavity to prevent water ingress and maintain the health of the building envelope.
- Outer Cladding Panel: The primary line of defence against rain and wind.
- Ventilated Cavity: A crucial gap that allows air circulation and moisture drainage.
- Support System: Brackets and rails (typically aluminium) that secure the panels to the structure.
- Insulation Layer: High-performance thermal material, often mineral wool in modern UK high-rise builds.
- Cavity Barriers: Essential fire-safety components that prevent the spread of flames within the void.
- Structural Backing: The internal wall, which could be concrete, masonry, or Steel Frame System (SFS).
Key Takeaways
- Management of Moisture: The ventilated rainscreen build up is designed to drain water and evaporate condensation, rather than just blocking it.
- Fire Safety Compliance: Post-Grenfell, the choice of non-combustible insulation and correct cavity barrier installation is mandatory for high-rise buildings in the UK.
- Thermal Performance: The layer of insulation within the build up reduces heat loss and helps meet Part L of the Building Regulations.
- Pressure Equalisation: A well-designed rainscreen wall layers system minimises the pressure difference across the cladding, preventing water from being sucked into the building.
- Maintenance and Inspection: Regular cladding testing and visual inspections are vital to identify issues like failed fixings or blocked cavities.
- Structural Integrity: The support frame must be engineered to withstand wind loads and the weight of the specific cladding material used.
The Fundamentals of Rainscreen Wall Layers
Understanding a rainscreen cladding system detail requires looking beyond the visible panels. In the UK, where wind-driven rain is a constant factor, the "rainscreen principle" is the industry standard for high-performance facades. The system works by separating the aesthetic outer skin from the airtight structural wall.
The primary purpose of this separation is to create a ventilated rainscreen build up. When rain hits the outer panel, the majority is deflected. Any water that passes through the panel joints enters the rainscreen cavity build up, where it either drains away via gravity or is evaporated by the constant flow of air through the ventilated gap.
This air gap is not just for drainage; it also acts as a thermal buffer. In the summer, the ventilated cavity reduces solar heat gain by carrying away warm air before it reaches the insulation. In the winter, it keeps the insulation dry, ensuring its thermal properties remain effective over the long term.
The Structural Backing Wall
The foundation of any rainscreen cladding build up is the backing wall. In modern UK developments, this is frequently a Steel Frame System (SFS) or a reinforced concrete frame. Older masonry buildings can also be retrofitted with rainscreen systems during remediation projects.
The backing wall must be treated with a Breather Membrane or a specialized airtightness layer. This prevents air leakage from the interior of the building while allowing any moisture vapour from inside the building to escape into the cavity. If this layer is damaged or poorly installed, it can lead to interstitial condensation, which risks rotting structural components over time.
The Insulation Layer
The insulation sits directly against the backing wall, held in place by dedicated fixings or "pine trees." In the context of current UK fire safety regulations (specifically for buildings over 11m or 18m depending on the specific region and use), this insulation must typically be non-combustible, such as mineral wool.
It is essential that the insulation is installed tightly with no gaps between boards. Any gaps in the insulation layer create "thermal bridges," which significantly reduce the building's energy efficiency and can lead to cold spots on internal walls where mould might form.
The Rainscreen Cavity Build Up: A Critical Component
The cavity is perhaps the most misunderstood element of the rainscreen cladding build up. It is not simply "dead space"; it is a functional ventilation zone. The depth of the cavity is strictly controlled, usually ranging from 25mm to 50mm, depending on the height of the building and the cladding type.
Ventilation is achieved through openings at the base (intake) and the head (exhaust) of the wall, as well as at window sills and heads. These openings are often protected by insect meshes to prevent pests from entering the void while allowing air to circulate freely.
Pressure Equalisation Explained
When wind blows against a building, it creates high pressure on the external face. If the cladding were a sealed box, this pressure would force rainwater through any small crack or joint. A ventilated rainscreen build up allows the air pressure inside the cavity to equalise with the outside pressure. Because the pressure is equal, there is no force "pushing" or "sucking" water into the system, drastically reducing the risk of leaks.
- Minimum Cavity Depth: Usually 25mm to ensure clear airflow.
- Drainage Path: Must be unobstructed by excess mortar or insulation offcuts.
- Airflow: Vertical airflow must be maintained throughout the height of the elevation.
Support Systems and Fixings
The rainscreen cladding system detail must account for the structural support that holds the panels in place. This usually involves a "Helping Hand" bracket system made from aluminium or stainless steel. These brackets are fixed through the insulation into the backing wall.
Vertical rails are then attached to these brackets. The cladding panels are fixed to the rails using one of several methods:
- Visible Fix: Rivets or screws that are colour-matched to the panel.
- Secret Fix (Mechanical): Hangers or clips on the back of the panel that hook onto the rails.
- Secret Fix (Adhesive): High-strength structural adhesives, though these are less common on high-rise residential buildings due to stringent safety requirements.
Thermal isolators (often plastic or rubber shims) are placed between the metal brackets and the backing wall to prevent thermal bridging. Without these, heat would escape through the metal fixings, leading to energy loss and potential condensation issues inside the wall build up.
Fire Safety: Cavity Barriers and Compliance
In any rainscreen wall layers discussion, fire safety is paramount. The very cavity that allows for ventilation can, if not correctly managed, act like a chimney in a fire, drawing flames and smoke upward through the building’s facade.
To prevent this, cavity barriers are installed at specific intervals—typically at every floor slab vertically and around all openings like windows and doors. These barriers are made of intumescent material that remains dormant under normal conditions to allow ventilation. However, when exposed to heat, the material expands rapidly to seal the cavity, stopping the spread of fire.
For building owners, ensuring these barriers are present and correctly installed is a primary focus of cladding testing and remediation work. A failure in the cavity barrier strategy can render an otherwise safe building non-compliant under the Building Safety Act.
Materials Used in Rainscreen Cladding Build Up
The choice of outer panel defines the look of the building and dictates the weight and structural requirements of the support system. Common materials include:
Aluminium Composite Material (ACM)
While ACM was widely used, its use is now strictly regulated. Only A1 or A2-s1, d0 rated (non-combustible or limited combustibility) versions are suitable for high-rise residential remediation. If your building has older, PE-cored ACM, a full recladding programme is likely necessary.
High-Pressure Laminate (HPL)
HPL panels offer a wide range of finishes but, like ACM, must be carefully checked for fire performance. Many HPL systems require specific fire-retardant cores to meet UK building standards for multi-storey properties.
Fibre Cement and Ceramic
These materials are naturally non-combustible and highly durable. They are heavier than metal composites, meaning the rainscreen cladding system detail must include more robust support rails and fixings to manage the dead load.
Metal Sheets (Aluminium, Zinc, Copper)
Solid metal planks or cassettes are popular for their longevity and recyclability. They are often used in "cassette" form, where the edges of the metal are folded to provide extra rigidity and a clean, hidden-fix appearance.
Rainscreen Cladding Build Up
Common Defects in Rainscreen Systems
Through our work at CladdingTesting.com, we frequently identify systemic issues in existing rainscreen build ups. These often stem from poor installation or a lack of understanding of the rainscreen principle during the original construction phase.
- Blocked Cavities: Insulation that has slumped or expanded, closing the air gap and preventing drainage.
- Missing Cavity Barriers: A critical fire safety defect where barriers were either omitted or incorrectly sized for the gap.
- Corroded Fixings: Use of incompatible metals (e.g., zinc-plated screws in aluminium rails) leading to galvanic corrosion and structural failure.
- Damaged Breather Membranes: Tears in the backing wall protection leading to water ingress into the internal SFS or timber frame.
- Inadequate Joint Spacing: Panels installed too close together, preventing thermal expansion and causing panels to warp or "oil-can."
Identifying these issues early through a structured cladding inspection can mean the difference between a localized repair and a multi-million-pound replacement project.
The Importance of Professional Inspection
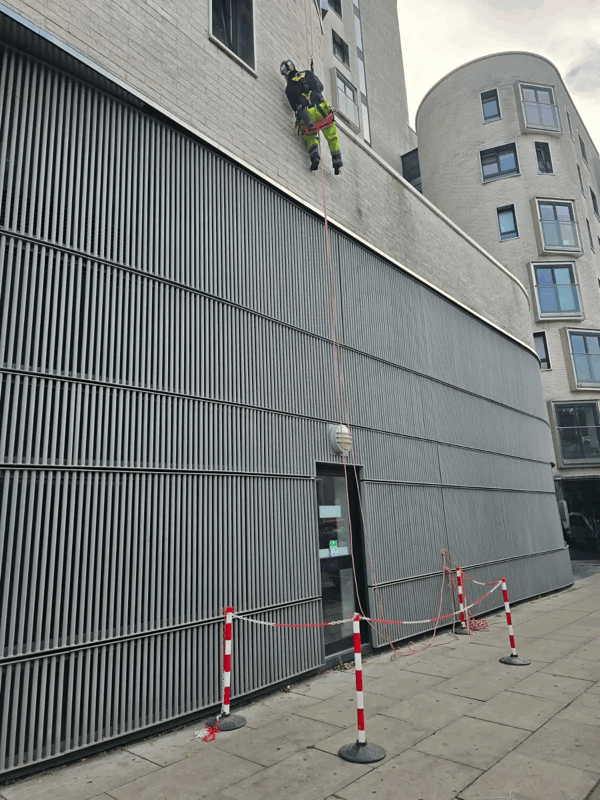
Because the most critical elements of a rainscreen cladding build up—the insulation, the cavity, and the fire barriers—are hidden behind the outer panels, visual inspections from the ground are rarely sufficient. Professional cladding testing usually involves "intrusive" inspections.
This process involves removing specific panels at various heights and locations on the building to inspect the rainscreen wall layers behind. We look for moisture levels, the condition of the fixings, and evidence of correct fire stopping. For managing agents and building owners, this data provides a clear roadmap for necessary remediation.
Step-by-Step: The Remediation Process
If a rainscreen cladding build up is found to be defective or non-compliant, a systematic approach to remediation is required. We advocate for a "survey-first" methodology to avoid unnecessary costs.
1. Initial Site Survey
Reviewing O&M (Operation and Maintenance) manuals and architectural drawings to understand the intended rainscreen cladding system detail. This is followed by a non-intrusive visual survey using drones or high-powered lenses.
2. Intrusive Investigation
Opening up the facade to inspect the ventilated rainscreen build up. This confirms if the "as-built" reality matches the drawings. We check insulation types, cavity barrier integrity, and fixing torque.
3. Options Appraisal
We determine if the system can be repaired (e.g., replacing only the cavity barriers or specific panels) or if a full recladding is required. This decision is based on safety, longevity, and cost-effectiveness for the building owner.
4. Design and Specification
Creating a new, fully compliant rainscreen cladding build up. This includes selecting materials that meet current UK Fire Regulations and ensuring the new system integrates perfectly with existing windows and rooflines.
5. Execution and Quality Control
Carrying out the works, often while the building remains occupied. This requires careful logistics and resident management to minimize disruption. Regular quality hold-points ensure the new rainscreen cavity build up is installed exactly to specification.
Technical Specification for a Compliant Build Up
When specifying a new system, engineers use detailed calculations to ensure the rainscreen cladding build up is fit for purpose. This includes:
// Example Calculation Factors for Rainscreen Design - Wind Load: kN/m2 (based on BS EN 1991-1-4) - Dead Load: Weight of panels + support rails - U-Value: Target thermal performance (e.g., 0.15 W/m2K) - Cavity Width: 25mm to 50mm ventilation gap - Fire Rating: A1 or A2-s1, d0 to BS EN 13501-1
Each of these factors influences the others. For example, a heavier stone panel will require more frequent brackets, which increases the number of thermal bridges, requiring thicker insulation to achieve the same U-value.
Managing High-Rise Challenges
Working on rainscreen cladding build up projects for tall buildings involves unique complexities. Access is often the biggest hurdle, requiring mast climbers, cradles, or advanced scaffolding systems. At CladdingTesting.com, we specialise in these high-stakes environments.
In occupied residential blocks, the sequence of work is vital. Removing the "skin" of a building leaves it temporarily more vulnerable to noise and temperature fluctuations. A disciplined contractor will ensure that insulation and weatherproofing layers are never left exposed to the elements overnight, maintaining the comfort and safety of the residents throughout the project.
Frequently Asked Questions
What is the minimum cavity depth for a rainscreen?
In the UK, the standard minimum depth for a ventilated rainscreen build up is 25mm. This ensures that even if there are slight misalignments in the insulation or support rails, there is still enough space for air to circulate and moisture to drain effectively. Some systems, particularly for very tall buildings, may require 38mm or 50mm cavities.
Do all rainscreen systems need to be replaced if they fail a fire test?
Not necessarily. In some cases, the outer panel may be compliant, but the rainscreen cavity build up may lack the necessary fire barriers. In these scenarios, "remediation" is possible, where the panels are carefully removed, new barriers are installed, and the original panels are reinstated. This is significantly more cost-effective than full replacement.
How does rainscreen cladding improve energy efficiency?
The rainscreen wall layers include a continuous layer of insulation outside the structural frame. This "warms" the structure and reduces the risk of thermal bridging compared to traditional cavity walls where the insulation is interrupted by wall ties and floor slabs. Additionally, the ventilated cavity reduces the cooling load in summer by preventing solar heat from reaching the building's interior.
What is the difference between a rainscreen and a rendered facade?
A rainscreen is a "dry" system consisting of panels and a ventilated gap. A rendered facade is a "wet" system where a decorative finish is applied directly to insulation or a carrier board. Rainscreens are generally more durable and easier to repair, as individual panels can be replaced without affecting the entire elevation.
Can you install rainscreen cladding on timber-frame buildings?
Yes, but the rainscreen cladding system detail must be very carefully managed. Timber is more sensitive to moisture, so the breather membrane and the ventilation within the rainscreen cavity build up must be flawless to prevent rot. Fire safety regulations for timber-framed high-rises are also particularly stringent.
How long does a typical rainscreen build up last?
A well-designed and correctly installed system should have a service life of at least 30 to 50 years. However, this depends on the material; for example, high-quality aluminium or zinc will outlast some lower-grade composites. Regular maintenance and cladding testing are required to reach these lifespans.
Advanced Insights: Future Trends in Facade Engineering
The industry is moving toward more "intelligent" facades. We are seeing the introduction of sensors within the rainscreen cavity build up that can monitor moisture levels and temperature in real-time, alerting facilities managers to potential leaks before they cause internal damage.
Sustainability is also driving change. There is an increasing focus on the "embodied carbon" of the rainscreen cladding build up. This means looking at the environmental cost of manufacturing aluminium and insulation, and moving toward recycled materials or systems that can be easily deconstructed and reused at the end of the building's life.
Furthermore, the integration of Building Information Modelling (BIM) allows us to create a digital twin of the cladding system. For new builds and major remediations, this means every bracket and panel is digitally logged, making future inspections and repairs much more straightforward for property professionals.
Conclusion for Property Professionals
For building owners and managing agents in the UK, the rainscreen cladding build up is more than just an aesthetic choice; it is a critical safety and performance system. Whether you are dealing with a legacy of non-compliant materials or simply maintaining an aging asset, a technical understanding of these layers is essential.
At CladdingTesting.com, our role is to demystify the complexities of the building envelope. We provide the expertise needed to navigate the investigation, testing, and remediation of rainscreen systems, ensuring your building remains safe, compliant, and thermally efficient for decades to come. If you have concerns about your building’s facade, the first step is always a professional, intrusive assessment to understand exactly what lies beneath the surface.
Rainscreen Cladding Build Up