
cladding parapet detail
Cladding Parapet Detail
The cladding parapet detail is a critical architectural junction where the vertical external wall system meets the roof edge or a raised protective barrier. This specific interface must manage several demanding requirements simultaneously, including weatherproofing, thermal performance, and fire safety. Because the parapet is exposed to the elements from multiple sides, it is often a primary site for water ingress or thermal bridging if not designed and installed with precision.
On this page
16 min read
Last updated
Cladding Parapet Detail
The cladding parapet detail is a critical architectural junction where the vertical external wall system meets the roof edge or a raised protective barrier. This specific interface must manage several demanding requirements simultaneously, including weatherproofing, thermal performance, and fire safety. Because the parapet is exposed to the elements from multiple sides, it is often a primary site for water ingress or thermal bridging if not designed and installed with precision.
In the context of modern UK construction, particularly for high-rise residential buildings, the facade parapet detail has gained significant attention during safety remediation projects. A poorly executed detail can lead to moisture entrapment within the rainscreen cavity, which degrades insulation and compromises the structural integrity of the cladding supports. Understanding the anatomy of this junction is essential for building owners and managing agents tasked with maintaining building safety and longevity.
A compliant cladding detail at parapet level typically involves the integration of the external rainscreen, a robust capping system, fire-stopping components, and a waterproof membrane that ties back into the roof system. Ensuring these elements work in harmony requires a multidisciplinary approach involving cladding specialists, roofing contractors, and fire safety consultants.
Key Takeaways
- Water Management: The parapet detail must direct water away from the facade to prevent staining and moisture ingress into the structural cavity.
- Fire Compliance: Cavity barriers must be correctly positioned at the parapet to prevent the vertical spread of fire within the external wall system.
- Thermal Continuity: Effective insulation at the parapet is necessary to eliminate cold bridges that lead to internal condensation and mould growth.
- Structural Integrity: The parapet capping must be securely fixed to withstand high wind loads, which are significantly increased at the top edges of tall buildings.
- Aesthetic Consistency: The detail must allow for thermal expansion and contraction of the cladding panels without distorting the visual line of the building.
- Remediation Focus: Many older high-rise buildings require specific upgrades to their parapet details to meet current Building Regulations (Approved Document B).
What is a Cladding Parapet Detail?
A cladding parapet detail is the technical specification and physical assembly used to terminate a cladding system at the top of an external wall. It acts as the "lid" for the entire wall build-up, sealing the internal cavity of a rainscreen parapet detail against the environment. This detail must bridge the gap between two different disciplines: the vertical facade and the horizontal roofing system.
In high-rise construction, the parapet often extends above the roof level to serve as a safety barrier for maintenance personnel. This means the external wall parapet junction is exposed to wind, rain, and solar radiation on both its outer and inner faces. Consequently, the materials used must be durable, non-combustible (where required), and capable of handling significant thermal movement throughout the seasons.
The Role of the Rainscreen Parapet Detail
The primary function of a rainscreen system is to manage moisture by allowing a small amount of water behind the outer panels, which then drains away. The rainscreen parapet detail is responsible for ensuring that water does not enter the top of this cavity. If the capping or flashing at the parapet fails, water can bypass the drainage layer and saturate the mineral wool insulation or damage the substrate, leading to costly remediation works.
Furthermore, the parapet detail serves as the primary termination point for the ventilation gap. Rainscreen systems rely on the "stack effect" to move air behind the panels and keep the structure dry. The parapet detail must allow for this air to exit while preventing birds, large insects, or wind-driven rain from entering the system. This is often achieved through the use of perforated closures or specific air-gap designs beneath the parapet capping.
Core Components of a Facade Parapet Detail
A robust facade parapet detail is composed of several layers, each serving a specific technical purpose. When we conduct a cladding testing inspection, we look for the presence and condition of these specific elements to ensure the system is performing as intended. Missing or incorrectly installed components are common causes of building envelope failure.
1. Parapet Capping and Flashings
The capping is the visible metal "hat" that sits on top of the parapet wall. It is typically manufactured from aluminium or steel and is designed with a slight fall (usually towards the roof side) to shed water. It must include a "drip edge" that extends past the cladding face, ensuring that water falls clear of the building rather than running down the panels and causing "tiger-striping" or mineral deposits.
2. Support Brackets and Sub-frames
The capping cannot be fixed directly to the cladding panels. It requires a dedicated support system, often consisting of galvanised steel or aluminium "cleats." These cleats must be strong enough to resist the uplift forces generated by high winds at the building's edge. In many cladding detail at parapet designs, these cleats also incorporate a thermal break to prevent heat loss from the building's interior.
3. Waterproofing Membranes
Beneath the metal capping lies a secondary line of defence: the waterproofing membrane. This is often a high-performance EPDM or bitumen-based sheet that is dressed over the top of the parapet wall and lapped into the roof's waterproofing. This ensures that even if a joint in the metal capping leaks, the water is still prevented from entering the wall cavity or the building's structure.
4. Fire Cavity Barriers
Fire safety is paramount in any external wall parapet junction. A horizontal cavity barrier must be installed at the top of the wall to close off the rainscreen cavity. This barrier is designed to expand in the event of a fire (intumescent) or maintain its physical integrity to prevent flames from "lapping" over the top of the wall and into the roof space or onto adjacent elevations.
Thermal Bridging and Performance at the Parapet
One of the most complex challenges in a cladding parapet detail is managing thermal performance. Because the parapet sits at the edge of the heated building envelope, it is a prime candidate for a "cold bridge." This occurs when a highly conductive material, such as a steel bracket or a concrete slab, passes through the insulation layer, creating a path for heat to escape.
In a facade parapet detail, this cold bridge can result in the internal temperature of the wall dropping below the "dew point." When this happens, moisture in the air condenses on the cold surface, leading to damp patches and mould growth inside the apartments or offices. This is a common complaint in buildings where the cladding detail at parapet was not thermally modelled during the design phase.
Strategies for Thermal Continuity
- Continuous Insulation: Wrapping the insulation over the top of the parapet and down the internal face to meet the roof insulation.
- Thermal Breaks: Using non-conductive spacers (such as PVC or high-density foam) between the metal cleats and the structural wall.
- Airtightness Seals: Ensuring that the vapour control layer (VCL) is securely taped and sealed to the roof membrane at the parapet junction.
- Material Selection: Choosing sub-frame materials with lower thermal conductivity where structural requirements allow.
Fire Safety Requirements for Parapet Details
Following the updates to the Building Regulations and the introduction of the Building Safety Act, the cladding parapet detail is under intense scrutiny. The junction is a critical point where fire could potentially bypass the facade's internal fire-stopping and spread into the roof. In the UK, specifically for "relevant buildings" over 11 or 18 metres, the materials used in this detail must generally be non-combustible (Euroclass A1 or A2-s1, d0).
The external wall parapet junction must incorporate cavity barriers that are tested to the relevant British Standards (such as BS 476 or EN 1366). These barriers are not just "fillers"; they are engineered components that must be sized correctly for the specific cavity width. During a cladding investigation, we often find that cavity barriers are either missing at the parapet or have been installed with gaps that render them ineffective.
Common Fire Safety Failures in Parapets
- Inadequate Overlap: The fire barrier does not sufficiently overlap with the roof's fire-stopping, leaving a "path of least resistance" for smoke and flame.
- Combustible Components: The use of timber grounds or combustible plywood pattresses to support the parapet capping.
- Incorrect Compression: Mineral wool cavity barriers must be installed under a specific amount of compression (usually 10-15mm) to ensure a tight seal against the cladding panels.
- Venting Issues: If the parapet detail closes the ventilation gap too tightly, it can cause moisture issues; if it is too open, it may fail to prevent fire spread.
The Impact of Wind Load on Parapet Cappings
The top of a high-rise building experiences the highest wind pressures. As wind hits the face of a building, it is forced upwards and accelerates over the roof edge, creating a "vortex" effect. This creates a significant suction force (negative pressure) on the rainscreen parapet detail. If the capping is not designed to withstand these loads, it can be ripped off the building, posing a severe risk to the public below.
Engineering the cladding detail at parapet involves calculating these wind loads based on the building's height, location, and local topography (following Eurocode 1). The fixings used for the cleats and the gauge of the metal used for the capping must be sufficient to prevent "flutter" or structural failure. We frequently assess these fixings during our inspections to ensure they haven't loosened or corroded over time.
Fixing Methods for Parapet Cappings
There are two primary ways to fix a parapet capping within a facade parapet detail:
- Secret-Fix Cleats: The capping "snaps" onto a pre-installed metal cleat. This allows for a clean aesthetic with no visible screws and permits the metal to expand and contract freely.
- Face-Fixing: The capping is screwed directly through the top or sides into the substrate. While more secure in extreme wind, it can lead to water ingress if the screw seals fail and can restrict thermal movement, leading to "oil-canning" (buckling) of the metal.
Water Ingress and the External Wall Parapet Junction
Water ingress is perhaps the most frequent issue associated with the cladding parapet detail. Because the junction involves multiple materials and trades (roofers, cladding installers, and window fitters), it is easy for small gaps to be left in the waterproofing line. These gaps allow "capillary action" to draw water into the building envelope.
When investigating a cladding detail at parapet, we look for signs of "ponding" on the capping. If the capping does not have a sufficient "fall" towards the roof, water will sit in puddles. Over time, this water can work its way through the lap joints of the capping, especially during heavy wind-driven rain. A well-designed detail will always prioritize shedding water over sealing it out.
Diagnostic Signs of Parapet Failure
- Internal Damp: Staining on the ceiling or high up on the internal walls of the top-floor apartments.
- Panel Discolouration: Dark streaks appearing at the very top of the cladding panels, indicating water is running behind the capping.
- Loose Cappings: Rattling sounds during high winds or visible movement in the metal trim.
- Sealant Degradation: Cracking or peeling of the silicone joints between capping sections.
Cladding Parapet Detail
Maintenance and Inspection of Parapet Details
Because of their location, parapet details are difficult to inspect without specialist access. However, they are among the most stressed parts of the building envelope. Regular maintenance is essential to prevent a minor leak from becoming a major remediation project. Managing agents should include the cladding parapet detail in their annual facade maintenance schedule.
A typical inspection involves checking the integrity of the capping joints, ensuring the drip edges are clear of debris, and verifying that the ventilation gaps haven't become blocked. For older buildings, it may be necessary to perform "intrusive" inspections, where a small section of the capping is removed to check the condition of the cavity barriers and insulation underneath.
The Role of CladdingTesting.com in Parapet Assessment
We provide a systematic approach to identifying failures in the rainscreen parapet detail. Our process includes:
- Visual Survey: Using high-resolution photography or drones to identify obvious defects like loose cappings or failed sealants.
- Intrusive Investigation: Removing panels or capping sections to inspect the "as-built" detail against the original design.
- Moisture Mapping: Using thermal imaging or electronic moisture probes to track the path of water ingress from the parapet.
- Compliance Review: Comparing the existing facade parapet detail against current Building Regulations and fire safety standards.
Remediation Options for Defective Parapet Details
If a cladding parapet detail is found to be non-compliant or failing, there are several routes to remediation. The choice depends on the severity of the issue, the age of the building, and the overall condition of the facade system. At CladdingTesting.com, we believe in a proportionate response—repairing where possible and replacing only where necessary.
Localised Repair
If the issue is limited to minor water ingress or sealant failure, a localised repair may be sufficient. This could involve installing new EPDM flashings under the capping, replacing failed fixings with higher-capacity alternatives, or re-sealing joints with high-performance mastics. This is often the most cost-effective solution for buildings that are otherwise structurally sound.
Systemic Remediation
Systemic remediation is required when the cladding detail at parapet is fundamentally flawed—for example, if the cavity barriers are entirely missing or the insulation is not fire-rated. This involves a more extensive programme of works where the capping and the top rows of cladding are removed, the internal wall build-up is corrected, and the system is reassembled using compliant materials.
Full Recladding
In cases where the entire external wall system is being replaced (due to the presence of ACM or other combustible materials), the external wall parapet junction will be redesigned from scratch. This allows for the implementation of modern best practices, including enhanced thermal breaks, superior waterproofing membranes, and robust fire-stopping that meets the latest EWS1 (External Wall System) requirements.
Design Variations in Cladding Parapet Details
The specific design of a cladding detail at parapet varies depending on the type of cladding system used. A brick slip system will have a very different interface than a metal rainscreen or a stone-clad facade. Understanding these nuances is key to a successful installation or repair.
Metal Rainscreen Parapets
These are common on modern commercial and residential blocks. The rainscreen parapet detail here usually features a matching aluminium capping. The main challenge is managing the high coefficient of thermal expansion in the metal; if the capping is too long without an expansion joint, it will buckle and warp in the summer heat.
Masonry and Brick Slip Parapets
For buildings with a traditional appearance, the parapet may be finished with a stone coping or a brick-on-edge detail. The cladding parapet detail in this case must ensure that the "Damp Proof Course" (DPC) is correctly integrated with the cladding's cavity tray. Failure here often leads to "efflorescence" (white salt staining) on the brickwork.
Rendered Parapets
Rendered facades often use a slim-line metal trim at the parapet. These are particularly vulnerable to cracking at the junction between the render and the trim. Any movement in the building's structure can cause the render to pull away, allowing water to get behind the "EWI" (External Wall Insulation) system.
Logistics and Access for Parapet Works
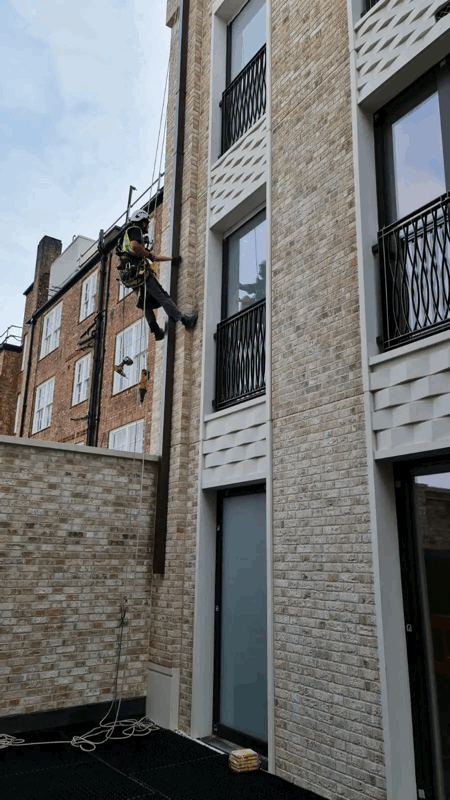
Carrying out remediation on an external wall parapet junction presents unique logistical challenges, especially on occupied high-rise buildings. Access is the primary concern; work usually requires a combination of mast climbers, cradles, or traditional scaffolding. In some cases, industrial rope access (abseiling) can be used for minor repairs or inspections.
Furthermore, because the parapet is at the roof edge, safety protocols must be strictly enforced. "Edge protection" is a legal requirement under the Work at Height Regulations 2005. For managing agents, coordinating these works often means balancing the need for safety with the desire to minimise disruption to residents, particularly regarding noise and the loss of privacy from scaffolding.
Sequencing the Work
Correct sequencing is vital to ensure the building remains watertight during the works. A typical remediation sequence for a cladding detail at parapet might look like this:
- Installation of temporary weather protection (tents or "shrink-wrap" scaffolding).
- Removal of existing cappings and flashings.
- Removal of the top row of cladding panels to expose the cavity.
- Installation of new fire barriers and non-combustible insulation.
- Application of the new waterproofing membrane, tied into the roof system.
- Installation of new support cleats and the final capping system.
The Importance of Professional Specification
A cladding detail at parapet should never be designed "on the fly" by contractors on-site. It requires a detailed specification and technical drawings produced by a facade engineer or an experienced architect. This specification should clearly define the material grades, fixing types, lap dimensions, and fire-rating requirements.
At CladdingTesting.com, we often assist clients by reviewing these specifications before work begins. We ensure that the cladding detail at parapet is not only compliant with the law but also practical to build and easy to maintain. A "paper-perfect" design that cannot be safely installed at 60 metres in the air is of no use to anyone.
Future Trends in Parapet Design
As the UK pushes towards "Net Zero" and higher building standards, the facade parapet detail is evolving. We are seeing a move towards "Modular Parapet Systems," which are pre-fabricated off-site. These systems offer higher precision and better quality control than traditionally built-up parapets, reducing the risk of installation errors.
Additionally, there is an increasing focus on the circular economy. This means designing the cladding detail at parapet so that it can be easily disassembled at the end of its life, allowing the aluminium and steel components to be recycled rather than sent to landfill. This forward-thinking approach is becoming a standard requirement for major developers and housing associations.
FAQs: Cladding Parapet Detail
Why is the parapet detail considered the most vulnerable part of a cladding system?
The parapet is exposed to the most extreme weather conditions, including high wind uplift and driving rain from multiple directions. It is also the point where two major building systems (the roof and the wall) meet, making it a high-risk area for design gaps and installation errors.
Does a parapet capping need to be made of non-combustible material?
In the UK, for buildings over 11 or 18 metres (depending on the specific regulation and building type), most components of the external wall, including the parapet capping and its supports, must be non-combustible (Euroclass A1 or A2-s1, d0).
How often should I have my building's parapet details inspected?
We recommend a professional visual inspection every 12 to 24 months. If your building is in a high-exposure area (such as on the coast) or is over 18 metres tall, more frequent checks of the fixings and joints are advisable.
Can a leaking parapet be fixed without replacing the entire cladding system?
Yes, in many cases. If the underlying cladding panels are compliant and in good condition, we can often perform targeted remediation of the cladding detail at parapet. This might involve replacing the capping, flashings, and seals while leaving the main facade intact.
What is "oil-canning" in a parapet capping?
"Oil-canning" is the visible buckling or waviness seen in flat metal panels. It usually occurs in a cladding detail at parapet when the metal is fixed too tightly and cannot expand or contract with temperature changes. While often an aesthetic issue, extreme oil-canning can stress fixings and lead to leaks.
What role does the cavity barrier play at the parapet?
The cavity barrier at the parapet closes the gap between the cladding and the inner wall. Its role is to stop fire from travelling up the cavity and spreading onto the roof or jumping to another part of the building. It is a mandatory safety feature in modern cladding parapet detail designs.
How do I know if my building's parapet detail is non-compliant?
The only way to be certain is through a professional cladding inspection. We look for the presence of combustible materials (like timber or certain foams), the absence of fire barriers, and evidence of poor water management that contradicts current Building Regulations.
Managing the complexities of a cladding parapet detail requires a balance of engineering precision and practical experience. Whether you are dealing with a known defect or simply ensuring the long-term health of your building, CladdingTesting.com provides the technical expertise to guide you from initial investigation to successful remediation. Our focus is always on providing a clear, evidence-based route to safety and compliance for every building we assess.
Cladding Parapet Detail